API Integration
This section covers how to integrate the Streamoji Avatars API into your application.
Step 1: Create a Developer Account
Before you can start using the Streamoji Avatars API, you need to create a developer account. This account will give you access to API keys and manage your usage.
To create your developer account:
- Visit the Streamoji Developer Console
- Enter your brand, company, or app name in the input field
- Click the "Create developer account" button
Once your account is created, you'll receive your API credentials and can proceed with setting up authentication and integrating the API into your application.
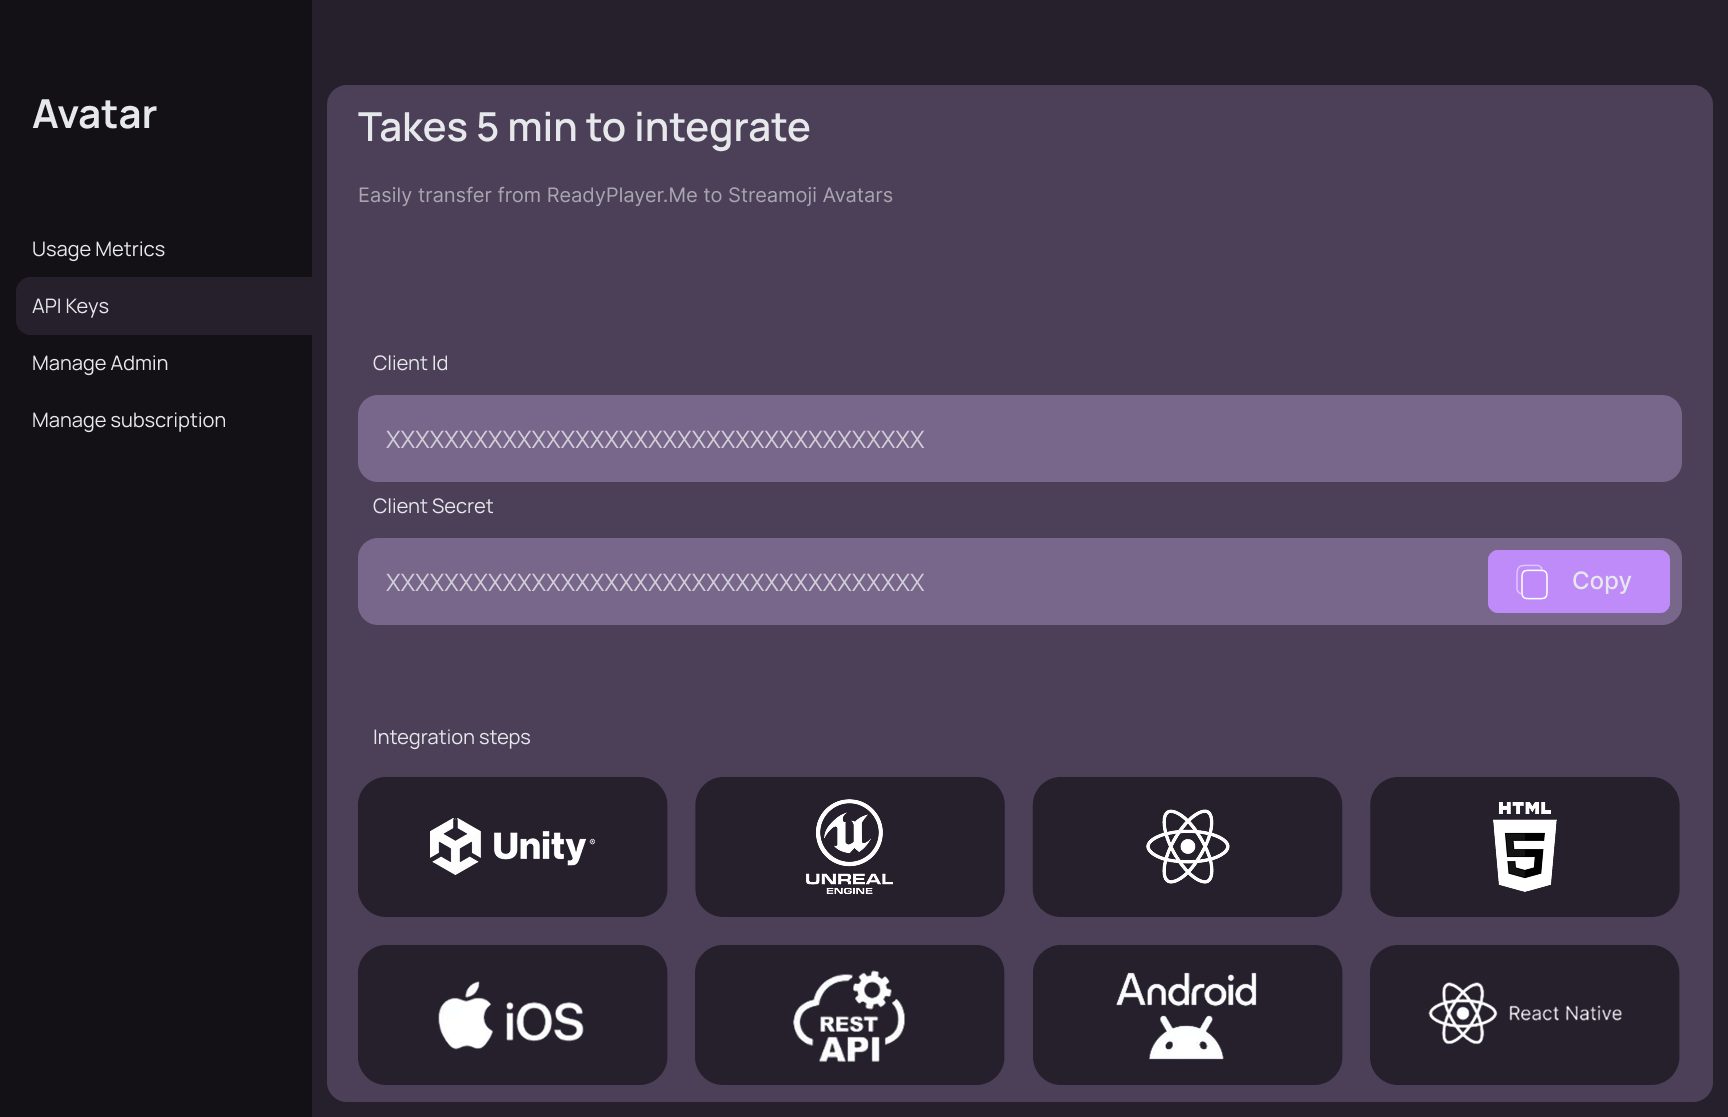
Step 2: Copy Your API Credentials
After creating your developer account, navigate to the "API Keys" section in the developer console. Here you'll find your Client ID and Client Secret, which are required for authenticating API requests.
To retrieve your credentials:
- Go to the "API Keys" section in the left sidebar
- Copy your Client ID
- Copy your Client Secret
- Keep these credentials secure and ready for the next step
Important: Keep your Client ID and Client Secret secure. You'll need these credentials in the next step to configure authentication in your application.
⚠️ Security Warning
NEVER expose your Client Secret in the frontend. The Client Secret must always be stored and used exclusively in your backend. Exposing it in client-side code (JavaScript/React) puts your account security at risk.
Step 3: Generate an Authentication Token
To interact with the Streamoji Avatars API, you need to generate a temporary Auth Token. These tokens are used to authorize your users and last for 30 minutes. You can generate an unlimited number of tokens.
Use your Client-Id and Client-Secret (from Step 2) in your backend to call the auth endpoint:
const CLIENT_ID = "YOUR_CLIENT_ID";
const CLIENT_SECRET = "YOUR_CLIENT_SECRET";

async function getAuthToken(maxAvatarsCreations) {
  try {
    const response = await fetch(
      "https://us-central1-streamoji-265f4.cloudfunctions.net/getAuthToken",
      {
        method: "POST",
        headers: {
          "Content-Type": "application/json",
          "Client-Secret": CLIENT_SECRET,
          "Client-Id": CLIENT_ID,
        },
        body: JSON.stringify({
          userId: "unique-user-id", // e.g., "user_123"
          userName: "John Doe",     // Display name
          // Optional: maximum number of avatars this user can create
          maxAvatarsCreations,
        }),
      }
    );

    const data = await response.json();

    if (!data.success) {
      throw new Error("Auth token generation failed");
    }

    // This token is valid for 30 minutes
    return data.authToken;
  } catch (error) {
    console.error("Error getting auth token:", error);
    throw error;
  }
}
Once you have the authToken, you can pass it to your frontend to initialize the Avatar Creator or make further API calls. The userId and userNameprovided during token generation will help you track activity in the Developer Console, allowing you to see how many avatars each user has saved. If you provide maxAvatarsCreations, that value is embedded in the token and used to enforce how many avatars this user can create when calling saveAvatarConfig.
Step 4: Fetch Available Assets
To provide customization options, you can fetch available assets (hair, clothes, eyes, etc.) using the getAssets endpoint. This allows you to present a dynamic selection of items to your users. You can optionally filter by a libraryId to load assets from a specific collection.
Fetch Assets
URL: GET https://glb.streamoji.com/api/assets
async function fetchAssets(authToken, applicationId, type = "top", libraryId = null) {
  const params = new URLSearchParams({
    limit: "100",
    page: "1",
    filter: "viewable-by-user-and-app",
    filterApplicationId: applicationId,
    type: type
  });

  if (libraryId) {
    params.append("libraryId", libraryId);
  }

  const url = `https://glb.streamoji.com/api/assets?${params.toString()}`;

  const response = await fetch(url, {
    headers: {
      "Authorization": `Bearer ${authToken}`,
      "Content-Type": "application/json"
    }
  });

  const { data } = await response.json();
  return data;
}
Example Asset Object
{
  "id": "49597582",
  "name": "Short Spiky Hair",
  "type": "hair",
  "gender": "male",
  "iconUrl": "https://..."
}
💡 Tip: Browse the Asset Library to see all available assets with previews and IDs.
Step 5: Edit Avatar
During the customization process, you can generate temporary GLB previews. This optimized process is designed for fast real-time edits.
Note: GLB files generated during this editing phase do not include blendshapes. This optimization ensures near-instant response times for a smooth user experience.
async function generatePreview(authToken, avatarConfig) {
  const formData = new FormData();
  formData.append("options", JSON.stringify({
    data: { assets: avatarConfig }
  }));

  const response = await fetch("https://glb.streamoji.com/api/process", {
    method: "POST",
    headers: { "Authorization": `Bearer ${authToken}` },
    body: formData
  });

  const blob = await response.blob();
  return URL.createObjectURL(blob);
}
Step 6: Save Avatar
Once the user has finalized their customization, save the configuration to the backend to generate a permanent avatarId.
async function saveAvatar(authToken, avatarConfig) {
  const response = await fetch(
    "https://us-central1-streamoji-265f4.cloudfunctions.net/saveAvatarConfig",
    {
      method: "POST",
      headers: {
        "Content-Type": "application/json",
        "Authorization": `Bearer ${authToken}`,
      },
      body: JSON.stringify({
        data: { avatarConfig: avatarConfig },
      }),
    }
  );

  const result = await response.json();
  return result.data.avatarId;
}
If the authToken was generated with a maxAvatarsCreations value, thesaveAvatarConfig endpoint will check how many avatars have already been created for this user and return an error instead of creating a new avatar once the limit is reached.
Step 7: Download Avatar
Use the avatarId to generate the final, high-quality GLB file for download.
Quality Boost: Unlike Step 5, the GLB generated using an avatarId includes all blendshapes, making it suitable for high-end character animation.
async function downloadAvatar(avatarId) {
  const response = await fetch(`https://glb.streamoji.com/api/process?avatarId=${avatarId}`, {
    method: "POST"
  });

  const blob = await response.blob();
  const url = window.URL.createObjectURL(blob);

  const link = document.createElement("a");
  link.href = url;
  link.download = `avatar-${avatarId}.glb`;
  document.body.appendChild(link);
  link.click();
  document.body.removeChild(link);
}
Extra 1: Fetch Saved Avatar IDs
If you want to see how many avatars a user has already created (and therefore how many are remaining), call getSavedAvatarsForUser.
async function getSavedAvatarsForUser(authToken) {
  const response = await fetch(
    "https://us-central1-streamoji-265f4.cloudfunctions.net/getSavedAvatarsForUser",
    {
      method: "GET",
      headers: {
        "Authorization": `Bearer ${authToken}`,
        "Content-Type": "application/json",
      },
    }
  );

  const json = await response.json();

  if (!json.success) {
    throw new Error(json.error || "Failed to fetch saved avatars");
  }

  return json.data.avatarIds;
}
If your auth token was created with maxAvatarsCreations, you can compute remaining usage as remaining = maxAvatarsCreations - avatarIds.length.